Orchids are stunning houseplants that look beautiful in every room. This is why they are one of the most popular plants to have. However, they are notoriously difficult to look after. This is why many people will panic when they start to notice that repotting an orchid with air roots!
However, air roots are definitely something that you shouldn’t panic about. They are very natural, and they help to keep your orchid healthily.
The main problem that gardeners face with air roots is how to deal with them when you repot your orchid (which you should be doing regularly).
To help you with this, we have created a step-by-step guide for you to follow that explains how you should repot an orchid with air roots, along with information on what air roots are and how to tell if they are healthy.

What Are Air Roots?
Air roots are essentially just roots that grow out of the ground. They are usually very long and thick. They are used by plants as a support system. Some people cut these roots off because they think it looks nice. However, cutting them off may cause damage to the plant.
Aerial roots are important for plants because they help them survive. When a plant loses all its roots, then the aerial roots become its lifeline.
The Importance Of Air Roots On Orchids
Orchids are beautiful flowers that grow in tropical areas. They are epiphytes, meaning they live on another plant. Their roots help them stay attached to the host plant. Orchids use their aerial roots to absorb nutrients and enough moisture from their environment.
Orchids need to grow up high in order to receive sunlight. So, cutting off the air roots isn’t recommended unless you really want to kill your plant. You should also make sure that the air roots aren’t damaged or dead before you cut them off.
Orchids need to be repotted when they grow aerial roots. These roots help them to get more nutrients from the air. When they grow too many aerial roots, it means that the roots are unhealthy and the plant cannot absorb enough nutrients from the soil.
Orchids also grow aerial roots because they need to find stability. These roots aren’t used to being buried, but if they’re placed under the soil, they’ll rot. The roots absorb water from the air, and they should never be watered.
Why Should You Repot An Orchid?
Orchids need to be repotted every year because they grow new roots. Roots should be protected from soil degradation by using a fresh potting mix. Air roots are normal features of orchids. They should not be stuffed into pots.
Orchids need fresh soil every year. You should think about replacing your pots every year as well, but if you notice any signs of disease or rotting roots, you should get rid of them right away.
Repotting an orchid with air roots is necessary if the soil is too acidic. Orchids prefer a neutral pH level of 7.0-7.4. A low pH level will cause the plant to wilt and die within months.
Orchids are plants that are very sensitive to water and soil conditions. They like to be rooted in the ground. When they’re growing in pots, they should be kept in an environment that mimics the natural habitat as much as possible.
Watering them too much or using fertilizers can cause the soil to degrade faster than normal. When this happens, the roots get stuck together and the plant needs to be moved to a bigger pot.
Roots will grow to the surface and attach to the sides of the pot. Then they will circle the outer rim of the container.
Orchids should be kept in pots made of terracotta or clay. If an orchid is planted in a plastic pot, it could suffocate if the soil dries up. To prevent this, keep the plant leaves and crown above the surface of the water.
Repotting An Orchid With Air Roots – A Step-By-Step Guide
Step 1. Soak The Orchid For At Least 10 Minutes.
Soaking the orchid (everything below the stem) in lukewarm water will help to soften up all the roots – whether they are in the air, or underneath the pot. This is incredibly important because you don’t want to damage the roots when you are removing the orchid from the pot.
However, if they are hard and not very malleable, they will break as soon as you try to remove them. The soaking process will help with this by filling up the velamen with water!
Step 2. Remove The Plant And The Old Potting Medium
Now that the roots are soft, you can take the plant out of the old pot. Make sure it is kept somewhere safe while you remove the old potting medium.
Some old potting soil may have fallen out while you removed the plant from its pot. You should shake off any remaining soil before planting your orchid. Don’t worry about removing bark pieces as long as they aren’t too big.
Roots should be cleaned gently, but thoroughly. You need to remove any loose dirt or debris before cleaning them. This is because some old potting materials may contain diseases or infections.
Step 3. Rinse The Roots With Lukewarm Water
Roots should be rinsed well before planting. Potting soil must be kept away from the crown of the plant.
To make sure your plant doesn’t get too much sun, use shade cloths or other plants to block out direct sunlight. You can also put your plant in a pot with a hole in the bottom to let the excess water drain away.
Roots should be trimmed off when they’re too long. You should trim off any bad roots with sterile scissors.
Roots should be cut back when they start looking unhealthy. Healthy roots are usually greenish or brownish, while unhealthy ones are yellowish or white.
Sterilizing your scissors/pruners is very important. You should do this every time you use them. Also, if you cut an orchid, make sure you clean up the dirt around the plant afterward. Orchids may be infected with diseases or pests.
Step 4. Spray With Hydrogen Peroxide
Now that you’ve cleaned up your garden, it’s time to spray the remaining roots with hydrogen peroxide 3%. This solution is safe to use on your plants, but please don’t go for stronger solutions to avoid any damage. Spraying your roots with hydrogen peroxide kills any possible fungal or bacterial infections, even pests.
I’ve been successfully using this technique for years now, but if you don’t have hydrogen peroxide at home, or simply don’t want to use it on your plants, then you can skip this step.
Step 5. Put The Orchid In A Clean Pot
Orchids don’t need a lot of room to grow. Roots should be cleaned and disinfected before putting them back into the pot. Old pots can be used as long as the roots fit inside them.
When you do this process, you will need to decide which roots need to be put into the pot and then covered by soil, and which roots need to stay outside the potting medium. This can be a tricky process!
It is very important for your orchid’s overall health that the air roots (that have been kept outside for quite some time) do stay outside the soil as much as possible.
This is because they need access to oxygen to survive – if they are buried underneath potting material and kept in a moist environment, they might start to rot very quickly.
Step 6. Fill The Pot With Chosen Orchid Potting Medium
Orchids need to be watered regularly. Watering them should be done every day. When watering, make sure you do not overfill the pots. You can also water them by sprinkling the top layer of soil. This method works better than pouring water directly onto the plants’ roots.
Potting media is essential when growing orchids. There are different types of media available, but you can always choose to make your own mix.
You can also buy ready-made mixes. Orchids require different types of media depending on how much moisture they need.
Sphagnum moss is often used by growers who want to grow orchids without using soil. Orchids can be grown in pots, trays, or hanging baskets.
Clay pebbles should be added to the bottom of your pots for better drainage and airflow.
Step 7. Water The Orchid
Orchids need to be watered regularly. You should do this every day.
Watering an orchid is easy. You need to fill up the pot with fresh soil, then add some water. Let the excess water drain out and put the orchid in its new location. This is how you repot orchids.
Don’t transfer any possible viruses or pests by moving orchids around! Keep your orchids safe by avoiding contact with other plants.
Related: Replanting Orchids: How to Safety Transplant Your Orchid
What Do Healthy Air Roots Look Like?
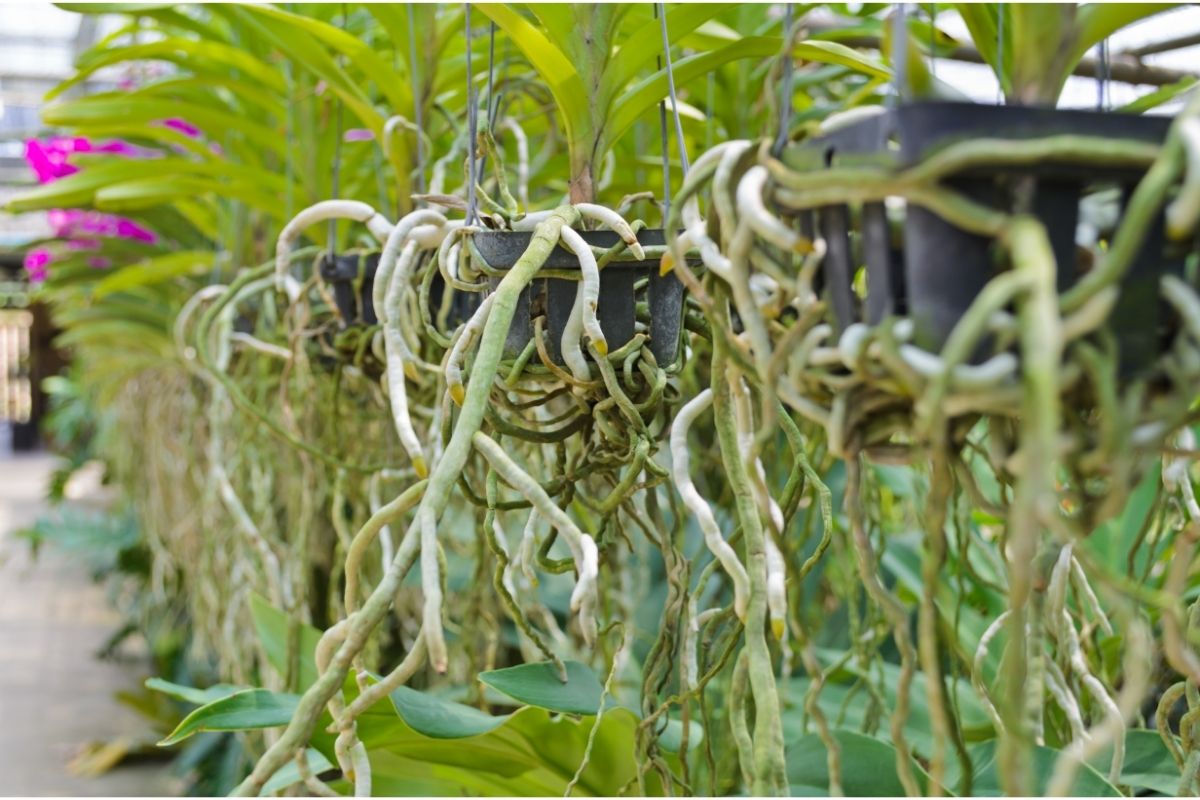
Air roots are basically roots that grow above the soil. These roots are usually visible because they are exposed to sunlight. Roots that grow up and around an orchid are called aerial roots. Other air roots will hang down over the edge of the pot.
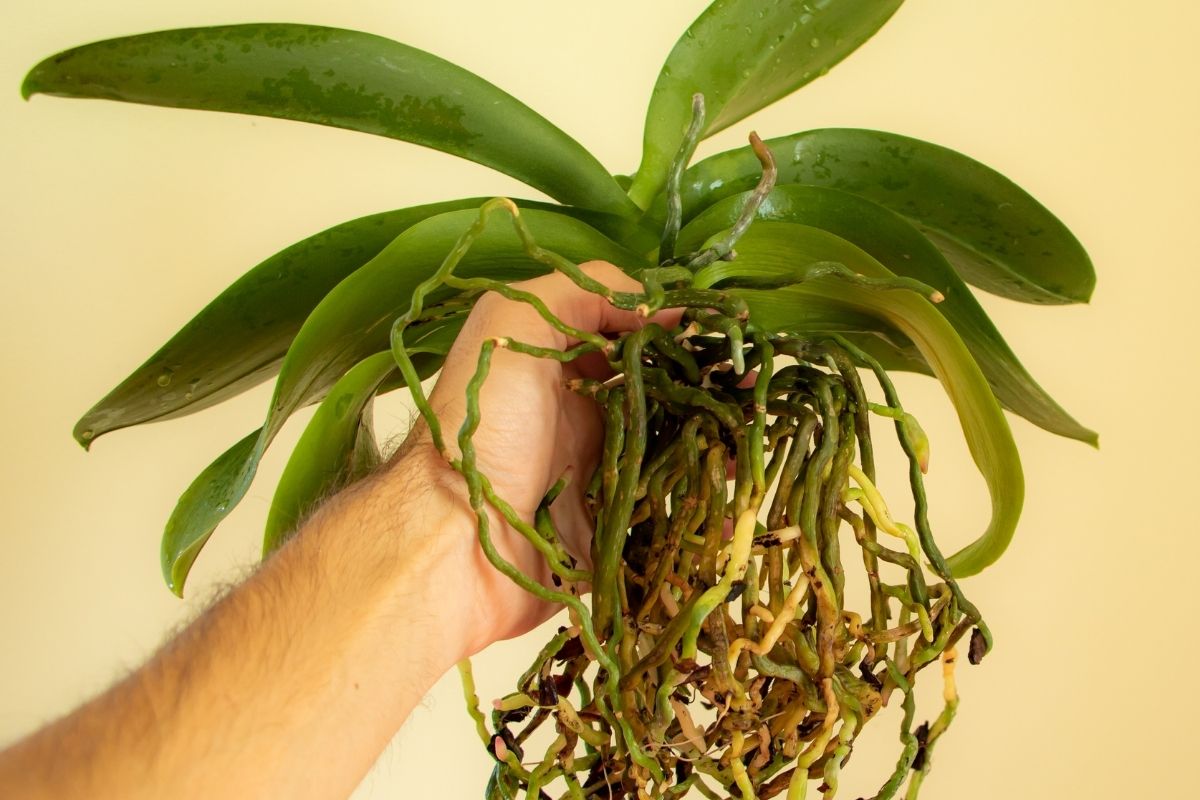
Healthy air roots are plump and firm. They twist up and around the plant. They can reach quite long distances. They can grow in any direction. If you’re not used to seeing them, then they can look almost alien.
In sympodial plants, such as Oncidium, Dendrobium, and Cattleya, they look like thin, white, or green tendrils creeping across the top of the soil.
Air roots are very important to an orchid because they help them stay upright. These air roots are typically green or white with green ends, but some orchids have purple and red tips.
Monopodial orchids have air roots that grow straight out of the top of the plant. Sympodial orchids grow air roots that grow sideways along the side of the plant.
Healthy aerial roots should be firm and unwrinkled, and not have any growing tips.
What Do Unhealthy Air Roots Look Like?
Healthy aerial roots should be bright green, firm, and elastic. Yellow, black, or brown aerial roots that are soft or slimy are most likely rotting and need to be removed.

Brown, black, and yellow aerial roots that are soft and mushy are most likely rotted and need to be removed as well. Gray, wrinkled aerial roots are most likely dying and need to be removed because they are very dry and dehydrated.
Very dry or dehydrated roots will be brown and paper-thin. You should prune off any dead roots.
Related: How To Revive A Dying Orchid Plant In Five Steps — Learning The Ropes
The Do’s And Do Not’s Of Repotting An Orchid With Air Roots
Soak All The Roots, Including The Air Roots, before You Repot Your Orchid.
Orchids need to be soaked in water to release their roots. This helps them grow better by allowing them to absorb nutrients from the soil. Orchids should be placed in pots made of clay or terracotta, as these materials won’t crack when wet.
Orchids should be soaked for about an hour before planting them. This helps prevent diseases from spreading into your plants. You also want to make sure that the soil around the plant is moist.
Root tips should be kept moist until repotted. Repotting medium should be packed firmly around the base of the plant. Air circulation should be allowed while repotting an orchid with air roots.
Determine Which Roots Will Be Repotted Inside The Potting Medium As Soon As You Start The Repotting Process.
All aerial roots should be kept outside the potting medium. This is the most common practice among orchid growers. Repotting them inside the potting medium may cause damage to the roots.
Never Trim or Cut Air Roots When Repotting Your Orchid
Orchids need to be pruned regularly. However, cutting off the air roots could cause the plant to wilt.
Orchids are beautiful flowers that grow in pots. Sometimes the roots inside your pot may be in such a bad shape, but the aerial roots are healthy.
You should only cut roots that have already been inside the potting soil because they are presenting some sort of harm to your orchids.
These roots should be removed because they are mushy, dry, have black rot on them, have some kind of fungal growth, or present overall plant death. These problems are due to two reasons: watering too frequently, and watering too much.
Remember: The Number Of Air Roots Do NOT Determine The Right Time To Repot An Orchid
Don’t repot your orchids simply because there are many aerial roots. The amount of aerial roots alone isn’t an indication that repotting is needed.
A perfectly healthy, growing, happy orchid could have many air roots. Instead, look at the potting medium and the roots within the container and decide if you need to repot it based on what you can see.
Final Thoughts
Air roots are normal occurrences in healthy growing orchids. Take the time to soak these before repotting. While you should prune off any dried-out, rotted, or dead roots, please don’t bury air roots in the pot. Leave healthy aerial roots outside your orchid pot!
Frequently Asked Questions:
Should You Repot An Orchid While It Is Blooming?
You should avoid repotting an orchid while it is blooming. Generally, the best time to repot an orchid is after it is finished blooming, because doing it while it has its beautiful flowers may cause it to die. The repotting process can be very stressful for an orchid, so it may ‘panic’ which will cause the blooms to die.
However, it is possible to repot an orchid while it is blooming – but only when it is necessary to save the orchid’s life. For example, if the roots are dying because they have become infected, then you should repot the plant immediately (no matter whether it is in bloom or not).
Editor’s Recommendations
50 Types of Orchid Flowers You Need to See (Including Pictures)


