Noticing your orchid leaves are changing their color from a healthy green into yellow might make you worried about your plant. It can happen for numerous reasons — from overwatering to excessive light exposure, and sometimes even fungus and bacterial infections. If you have orchid leaves turning yellow, then read this article for my tips on how you can save your plant.
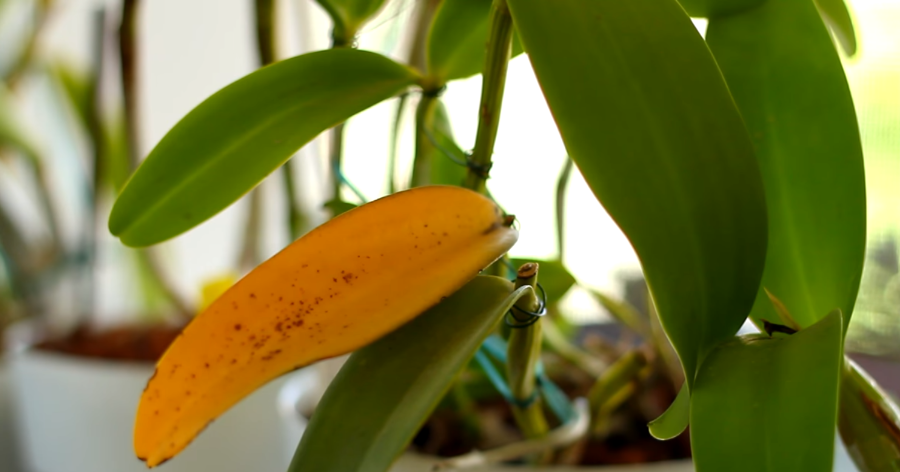
To figure out what is making the leaves on your orchid turn yellow, you should check out some of the most common causes:
- Rotting roots
- Nutrition issues
- High light exposure
- Low-Temperature exposure
- Chemical exposure
- Drought
- Pests
- Fungal disease
- Viruses
- Aging
Reexamining the way you culture your plant is a good beginning. You should reconsider the amount of water, fertilizer, and light your orchid receives. Also, be careful about the chemicals you use to protect the plant.
If the missteps in cultivation do not cause the issue, the good idea is to inspect for pests like mites or fungal infections.
To help you detect what is going on with your orchid, this guide describes the reasons in great detail and shows you the best ways to resolve the issue.
Yellowing Caused By Rotting Roots
Yellowing leaves on your orchid might indicate that the roots are rotting. That is something that usually happens due to overwatering.
In their natural habitats, orchids grow in places where they get a lot of aeration. As a result, you will see them with the roots wrapped around tree branches.
That doesn’t mean your homegrown plant doesn’t need water, but the amount and the way they receive it is crucial for orchids’ health.
Too much water will “drown” the plant roots due to a lack of oxygen, causing them to rot. Because of that, the rest of the plant (meaning stalk, leaves, and flowers) will not be able to receive the necessary nutrients.
Without the means to get the minerals and the water (the right amount) from the soil, leaves will stop producing chlorophyll, and yellowing will be the first phase of that devastating process.
To save your orchid from demise, you should keep it in a pot that doesn’t hold too much water.
How To Determine If Your Orchid Is Drowning?
Orchid growing specialists emphasize the importance of “even watering,” which is something you can quickly determine if you grow the orchid in a plastic container. All you need to do is lift the pot, and if it is heavy, there is more than enough water.
An excellent way to inspect this is by inserting a wooden pencil or a toothpick into the soil. Then, if it comes out darkened with moisture, your orchid doesn’t need more water.
You can also poke the medium in a pot with your finger. If the mix feels wet, you should let it dry before the next watering.
How To Avoid Overwatering And Prevent Root Rot?

Overwatering is a common mistake among first-time orchid growers. Unfortunately, most of the species of this plant grow in tropical forests, so many beginners may presume that it needs a constantly wet and warm medium.
Orchids love humidity, but soaking its medium every couple of days to achieve that is not good. So instead, watering your plant once a week during Spring and Summer will suffice, while during Autumn and Winter, you can scale back to once every two weeks.
Before watering, test the mixture (soil) by poking it with a pencil or toothpick, and if the first inch (2.5 cm) is dry, you are good to go. The best time of the day to water the orchid is early morning.
You can do that by placing the plant in a kitchen sink and watering it for about 15 seconds, ensuring that the mixture is thoroughly wet. Use lukewarm water. Once you have finished watering, leave the plant to drain.
Orchid potting medium is also something to pay attention to. You should avoid using regular soil or moss and use mixtures that resemble the most to the natural conditions in which these plants grow.
Ideally, use fir or pine bark, but you can also plant your orchid in mixes with dry tree fern, perlite, charcoal, sphagnum and peat moss, coconut fibers, and lava rocks. It would be best if you changed the medium once a year.
Table of Watering Frequency For Different Orchid Species
RELATED: Are 9 Rare Terrific Most Demanding Black Orchids Really On Earth
Yellowing Caused By Nutrition Issues
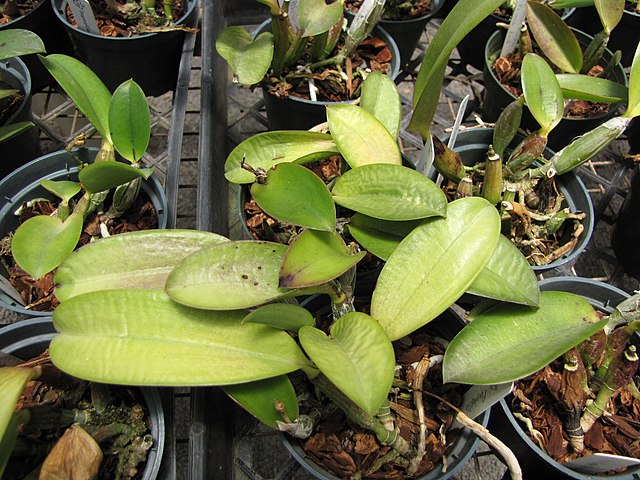
Yellowing leaves on your orchid may be a sign of nourishment disbalance. In addition, it indicates some problems with the amount and the type of fertilizer you use on your plant.
Overfertilizing
The potting mixture and water supply the orchid with the micronutrients it needs, but a fertilizer also plays a significant role in that field. Using it weekly allows the orchid roots to develop correctly, stimulates blossom, and contributes to the plant’s overall health.
Still, too much fertilizer will cause severe damage to orchid roots. Adding even a ted more of it to the mixture than you are supposed to may burn the roots, inhibiting plant growth.
It is something you will spot easily since the tips of the orchid leaves will turn yellowish-brown. The best thing you can do is flush it out of the pot using tap water when that happens. Keep the pot under the water for several minutes.
That will dissolve the excess salts accumulating in the soil and cause burns. Let the plant drain and leave its medium to dry for a week, then check out the roots. If their color is light greyish or green, the roots of your orchid are healthy.
In case their color is black or brown, they haven’t recuperated. Since the plant cannot use these roots to receive the nutrients and water, you should remove them and repot your plant.
Underfertilizing
Regular feeding is of the utmost importance for an orchid, especially in the active growth stage. During this period, the plant might lack calcium.
That can cause the tips of new leaves to turn black. The blackening may spread down the leaf, followed by a yellow halo.
To avoid these unpleasant surprises, use a fertilizer with special additives. For example, some growers advise adding dolomitic lime to the pot to supply your plant with calcium and magnesium and raise your potting medium pH.
How To Fertilize Your Orchid Correctly?
Most orchid experts recommend fertilizing the plant every time you water. In addition, they suggest applying dilute fertilizer of 1/4 strength.
Others may choose the monthly approach, where you apply a total dose. Whichever you choose, make sure that the potting mixture is not dry. Pouring fertilizer without previously watering the plant may burn its roots.
The most common suggestion regarding the choice of additional orchid nourishment is balanced fertilizers. These should have a label indicating how much N-P-K (nitrogen-phosphorus-potassium) they contain.
Usually, it is in a 20-20-20 ratio, but it can also be 11-35-15, 2-2-4, 1-3-1, 10-10-10. Your choice will depend on the orchid species you cultivate.
Yellowing Caused By High Light Exposure
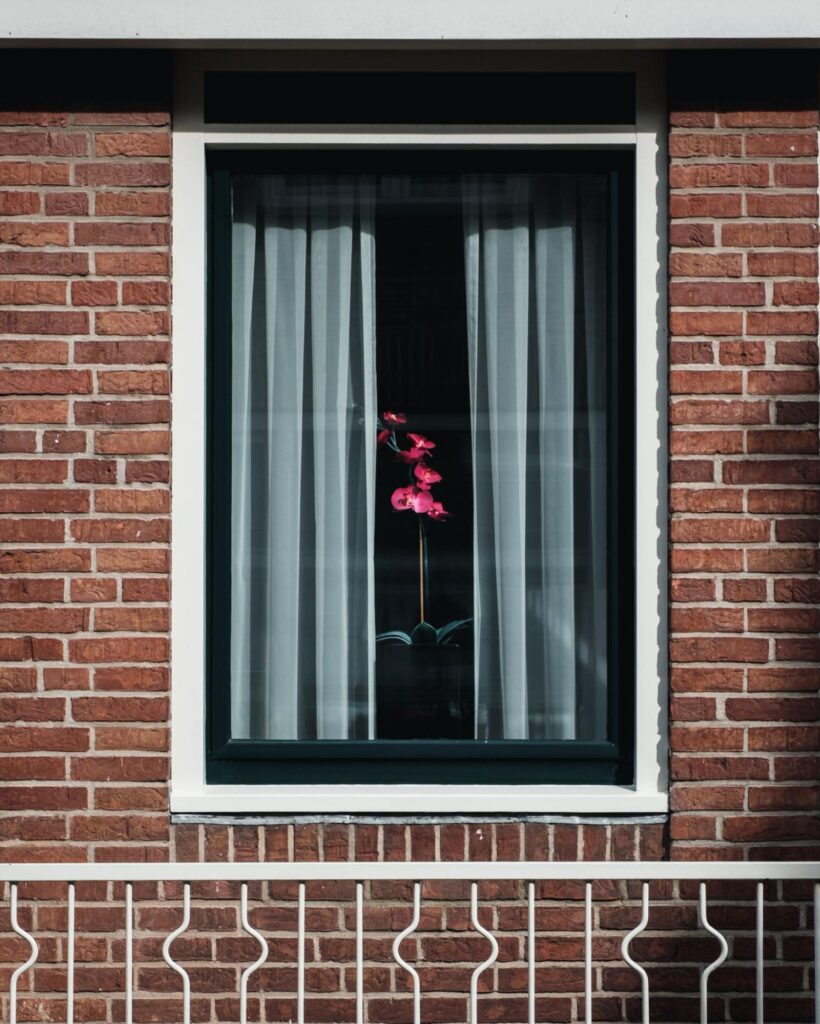
Another crucial factor in orchid growing is light. While the lack of it makes leaves turn dark green, from too much exposure, they can become yellow with a purple or red cast to them.
Direct exposure can even cause sunburn that can either produce stains on leaves or make the entire plant start turning yellow. Intense sunlight is something orchids do not tolerate.
If you notice the change in the leaf coloration, check out the sources of light and the placement of your plan. In case there is too much direct sunlight, leaves closest to their source will be yellow the most.
Consider moving the plant to someplace with indirect light, where it will be able to create energy for flowering. Though orchids may recover from the sunburns, yellow leaves will not recuperate, and they will fall off eventually.
How To Save Your Orchid From Sunburns?
The simplest way to help your plant avoid direct light is by moving to a place with more shade. Since orchids grow in forests, it is important to provide your houseplant conditions similar to those it would have in its natural habitat.
That way, you will be able to reduce the damage sunlight causes. Since yellow and burnt leaves will not be able to produce chlorophyll, they will fall off. Experienced growers advise waiting for that to happen rather than removing them yourself.
If you try to cut them off, there is a good chance you will damage the plant even more and slow down its recovery.
To help your orchid heal faster, you can repot it in a see-through plastic pot. Its roots are able to take the role of the damaged leaves and produce energy by photosynthesizing. The plant will synthesize all substances necessary to grow until it gets the new leaves.
Growing Under Artificial Lights
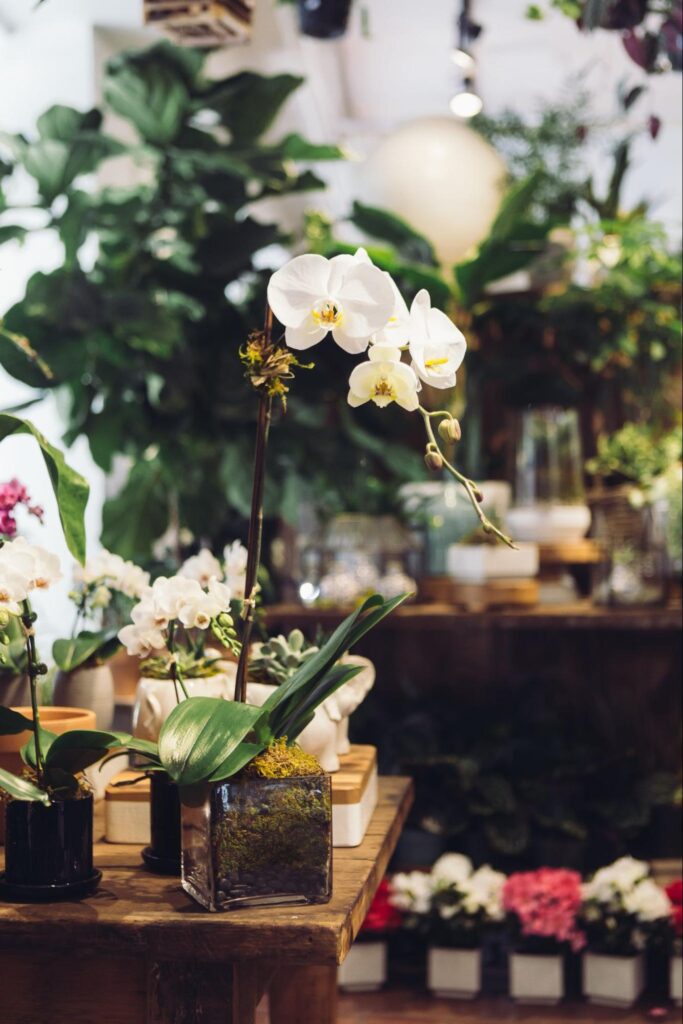
Direct light or high exposure will probably not be an issue if you are growing orchids under artificial lights. The best option for this type of cultivation is full-spectrum fluorescent bulbs.
In the same light fitting, you can use both warm and cool bulbs. Make sure you don’t keep them on for more than 16 hours but don’t keep the orchids in the dark for too long. Insufficient light will result in poor growth, and plants will not be unable to produce flowers.
Still, it is a great way to cultivate some species that stay petite even after they reach maturities, such as Phalaenopsis, Sophronitis, Dendrobiums, Pleurothallidis, and Angraecoids.
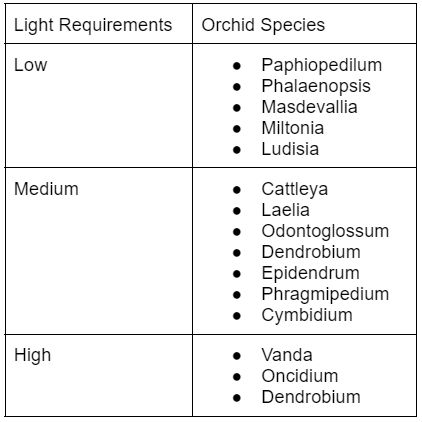
Table Of Light Requirements For Various Orchid Species
Yellowing Caused By Chemical Exposure
Yellowing can be a sign that your orchid has been exposed to a high level of toxins. That can happen if you use pesticides or herbicides that are not meant to be used on these plants or due to a wrong concentration mix.
It is of the utmost importance to ensure the chemicals you decided to use were previously approved for applying to orchids. While mixing them, you should make sure you are doing it according to the label.
Air pollution is also a threat to your plant, especially if there is sulfur dioxide, ozone, and ethylene. The last one, aside from the outdoors, can come indoors, and the sources can be pilot heaters, stoves, and lights.
A high concentration of these chemicals can cause older orchid leaves to drop and turn yellow and damage the flower. The solution for this issue is good ventilation. In case the chemicals are coming from the inside, you can also try making draught by opening doors and windows.
RELATED: Replanting Orchids: How To Safety Transplant Your Orchid
Yellowing Caused By Low-Temperature Exposure
Low temperatures is also something to watch out for when taking care of orchids. Even though these plants enjoy shadows and humidity, they do not take the cold too kindly.
There are many indicators that low temperatures are affecting orchids, and yellow-spotted leaves are one of them. This happens when your plant growing place is colder than 55℉ (12℃). Some growers say that even temperatures below 60℉ (14℃) can cause damage.
During the nighttime, the ideal temperature for orchids is 55℉ at least, while during the day, these plants can withstand up to 80℉ (27℃).
Yellowing Caused By Drought
If you wish to cultivate a healthy orchid with green leaves, growing conditions are everything. Aside from making sure there is enough light, water, fertilizer, and the right temperature, it is crucial to keep your plant away from the drought.
Though orchids don’t appreciate too much watering, they do need humidity to thrive. Otherwise, their leaves might start turning yellow, indicating that the plant’s surrounding is not adequate.
In that case, you should relocate the orchid to a part of your home where the air is not too dry. You can also use a humidifier, and regularly mist or shower your plants. Growing them in groups can also help.
Yellowing Caused By Pests
Due to its sensitive nature, an orchid is prone to various pests and leaf yellowing may announce their presence. They will most likely be easy to spot with a bare eye, but if that is not the case, a change of color will be one of the warning signs.
Scale
This is the insect that attacks orchids grown in northern climates. There have been identified around 27 species of this pest from orchids. The most common is the brown scale (Coccus hesperidium), also known as the brown soft scale, which can survive the northern climate.
The brown soft scale can infect greenhouse and indoor cultivated plants. These are also the most frequent targets of an armored Boisduvial scale (Diaspis boisduvali).
The brown scale is easy to recognize since it has light yellow to dark brown shells. It will appear on almost every part of the plant —pseudobulbs, sepals, leaves, petals, and sometimes even roots.
Boisduval scale might be mistaken for mealy bugs if you don’t examine it carefully since the males of this insect have similar cottony looks. Females are light-colored and rounded.
Crawlers of all scale species are yellowish to pinkish and so tiny that it is not easy to spot them with a bare eye.
The way the plants get infested in most cases is to buy a plant that already has scale. In the early phase, as crawlers, these insects can easily transfer from one plant to the other, especially if there is a clean plant nearby.
Infestation happens both indoors and outdoors when windblown crawlers get to the plant and colonize it. If they are present, you will notice yellow patches on your orchid leaves.
How To Get Rid Of Scale?
Once it infests the plant, the scale is pretty persistent and it will take a serious effort to get rid of it. The first step is to isolate infested plants.
Light infestations can be eradicated by home remedies, which is something growers recommend rather than insecticides. You can start with rubbing alcohol which you will use to spray it on the plant. Avoid using methanol or ethanol because they can damage the orchid tissue.
If the infestation is becoming extreme, you should repot the plant. There is a good chance that the potting medium is filled with eggs and crawlers, and the only way to save the plant is to replace it with a fresh mixing.
In case that is not enough, try applying horticultural and mineral oils, or insecticidal soaps. Oils should smother the pests — all you need is to mix them with a plant-safe detergent and water. Apply by spraying. Still, avoid using them on hot days because they can damage the plant.
Some consider insecticidal soaps to be safe to use, yet they can also hurt the plant, especially the new tissue.
The final step in a battle against pests is insecticides. They are the most efficient but can be highly toxic for both humans and plants. When applying, you should be especially careful.
Growers recommend spraying the plant with insecticide by placing it in a plastic bag and leaving it until the spray settles in. Afterward, remove the bag and let the plant ventilate in an isolated area.
Aphids
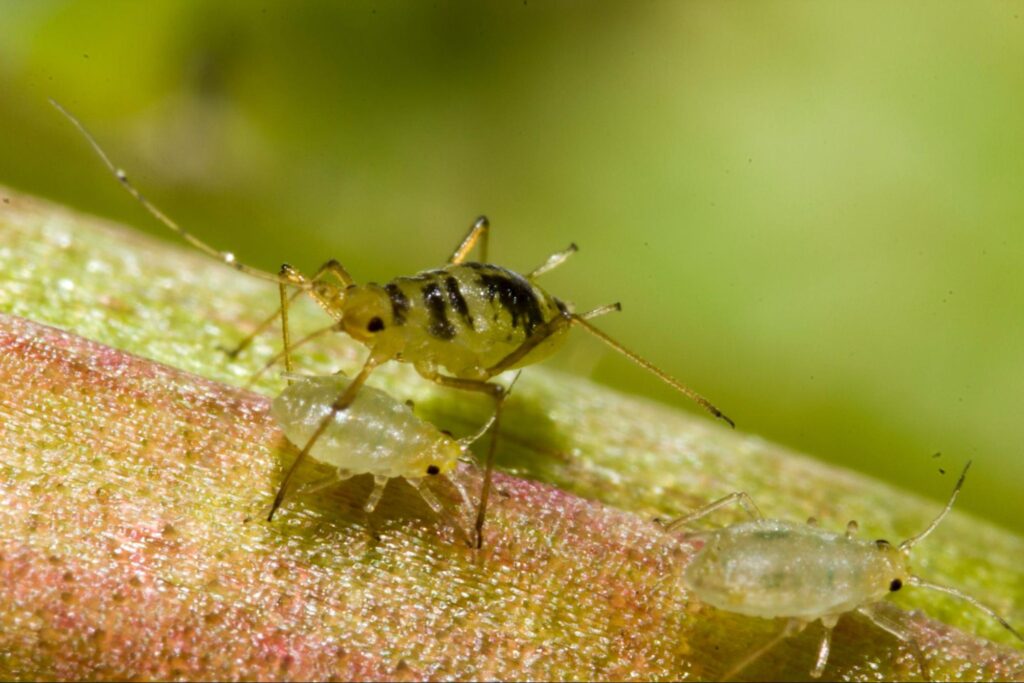
These are aggressive orchid-feeding pests that infest soft new leaves, flowers, and buds. If they are feeding on leaves and stems debilitates the plant and causes generalized yellowing.
The most common species are sooty mold and honeydew, which infect both plants growing outdoors and inside the greenhouse. Aphids usually attack the plant during autumn or winter, but in warm climates, they can be a whole year problem.
They are pear-shaped and soft-bodied small insects, black or greenish, and less than 1/8 inch long (0.3 cm). The females of these insects go through the reproduction process every day for up to 30 days, giving birth to between 60 and 100 nymphs. It will take only seven days for these freshly born aphids to become fully grown and ready for further reproduction.
Since they are capable of colonizing within a couple of days, they can also kill the plant pretty quickly. Aphids will feed on the parts of the orchid that receive the most nutrients, and as they do so, toxins in their salivary secretions may cause further damage.
For instance, honeydew will leave a syrupy material on leaves and stems. That will create ideal conditions for sooty mould, a fungus that also leaves black spots on the leaves.
How To Prevent And Control The Aphid Infestation?
Since aphids can cause so much damage so quickly, you should do everything in your power to prevent them from coming anywhere near your orchid. The most common way of infestation is acquiring the plant that already hosts these pests. From it, aphids will easily move to another, clean plant.
On the bright side, if they do infest your plant, you can eradicate them rather smoothly. You can start with sticky traps designed to capture alate or winged aphids. In case you don’t have these, housefly sticky strips can be a good alternative.
Isopropyl alcohol is also something that will do the job. You can find it in cosmetic shops and pharmacies, usually in the form of a 70% solution. Before applying it to a plant, dilute it to 35% and add 2 or 3 drops of dishwashing detergent.
It will be especially effective in combination with mechanical (hand) removal of aphids. However, it may damage the flowers and foliage; you shouldn’t use it more than once every 7 to 10 days. The same goes for all other treatments.
If the orchid medium is infested, a good solution is a diatomaceous earth. Fossilized diatoms with sharp edges cut the aphids’ membranes, making them dehydrate and die out. To achieve the desired effect, you should keep diatomaceous earth dry.
Aside from these, you can also try out horticultural and neem oils (even common vegetable oils will do the trick), insecticidal soaps and detergents, and orchid-friendly pesticides. When applying either of them, make sure to use the right amount of the solution, and avoid spreading it while the plant is exposed to direct light.
Mites
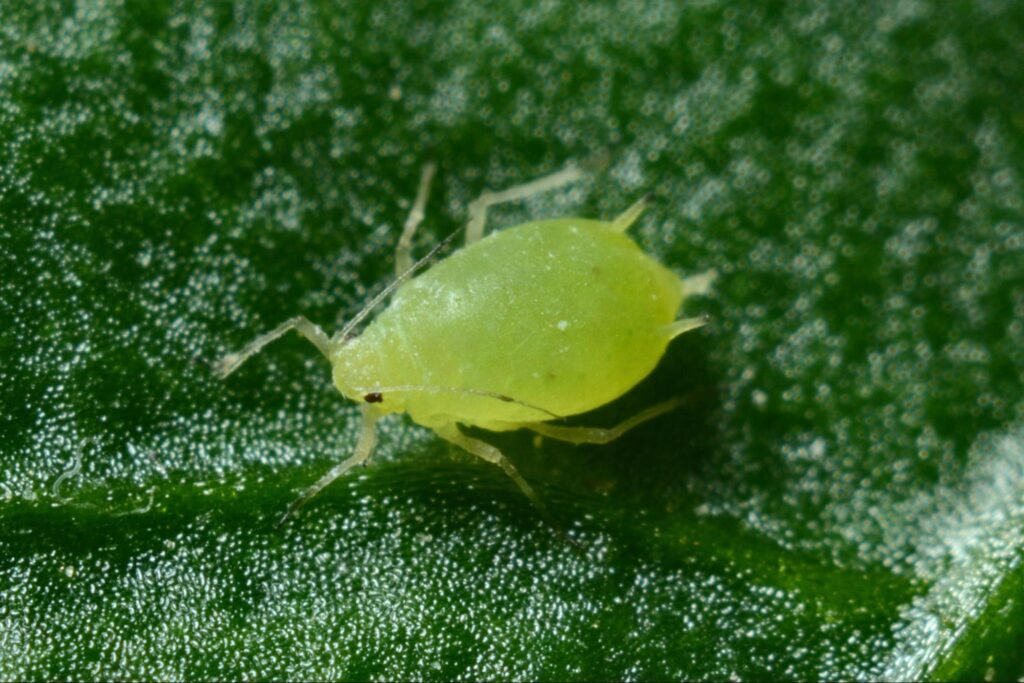
Mites is tiny insects almost invisible to the naked eye. They share the family three with ticks, spiders, and even scorpions. Because of their size, you will not be able to detect them until the damage they made becomes visible.
One of the signs that confirms the presence of mites is many tiny yellow spots appearing on the leaf. Over time, those spots will turn brown. The foliage that is heavily infested will start yellowing and fall off.
Spider mites, the most common among these pests, will give orchid leaves a silvery shine and spin webs under them. You can detect them easily by sprinkling the water over foliage and holding the plant against the light.
Another type of this insect to infest the orchids is false spider mites. They can also make leaves look silvery, yet they don’t make webs.
Mites are specialists in chlorophyll extraction, which means they can damage the orchid severely. As they remove the primary source of the plant’s energy, they will weaken the plant and could even become virus transmitters.
How To Fight Off And Eradicate Mites?
Since mites are almost impossible to detect by simply looking at the plant, growers recommend running a test with a white cloth. Just wipe the leaf on both sides. If the mites have laid the eggs, the fabric will have reddish or brownish smears.
The female mites can lay up to 100 eggs during the three weeks. In warm temperatures, their reproduction cycle can be even faster, meaning that the temperature plays a crucial role in their development.
With that in mind, you can prevent mites infestation by ensuring your orchid grows in the right conditions. You can raise the humidity in the orchid growing area to fight off these insects.
Some growers also recommend moving your plant to the garden, where the mites’ natural enemies may resolve this issue for you.
You can also try using the pint of rubbing alcohol mixed with water and a pint of cleaner and apply it by spaying.
Yellowing Caused By Fungal Infections
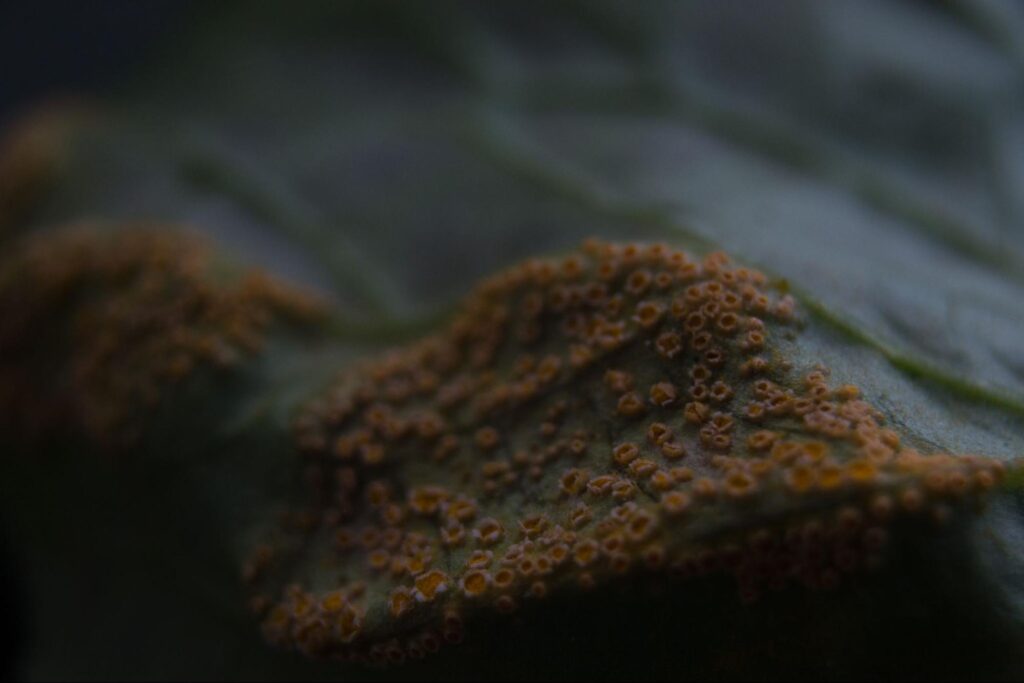
Fungal disease is something you shouldn’t take lightly. They can affect the orchid so severely that you might not be able to salvage the plant.
Several species of fungus can cause the yellowing of the orchid leaves — Fusarium wilt, Cercospora, and Pyllosticta leaf-spot fungus.
Fusarium usually attacks plant roots and damages the rhizomes, which typically have a purple discoloration if the fungus is present.
The first indicator of Cearcospora presence is yellow marks on the bottom side of the leaves, which is also the case with Pyllosticta leaf spots. When it comes to Fusarium wilt, the unmistakable sign of its presence is shriveled yellow leaves.
When fungi like these infect the leaf, they will fall off prematurely, and the only thing you can do is prevent them from spreading any further.
How To Control And Prevent Fungal Infection?
Low temperatures and areas with less light make perfect conditions for fungi spreading. To prevent that, make sure your orchid is growing in a place with enough humidity, light, and warmth.
When watering, ensure the plant has enough time to dry before the nightfall and provide your orchid with adequate aeration. Cleaning your growing area regularly also helps prevent these types of infections.
Keeping infected orchids near other plants is never a good idea. If you detect any sort of pest or fungal disease, you should isolate the affected plant.
Once you do that, start carefully removing infected leaves. Some growers recommend using a sterilized razor to cut them off, but that is something you should avoid if you are not skilled enough.
Experienced orchid enthusiasts also suggest covering Pyllasticta lesions with clear nail polish to prevent spore spreading and dissemination.
Yellowing Caused By Virus
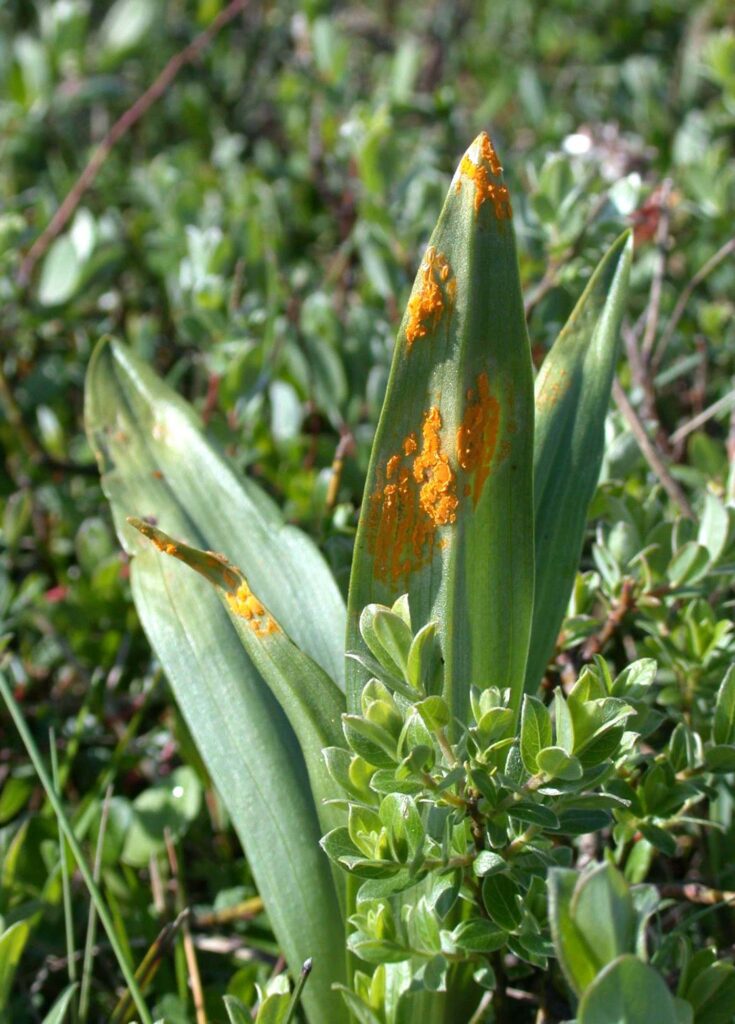
If you notice the yellow stripes on the leaves of your orchid, that might suggest the presence of a virus. These plants are quite vulnerable to various factors, and, aside from pests, bacteria, and fungi, viruses are some of the most important (and potentially damaging).
So far, there are around 27 viruses that infect orchids worldwide. They are minuscule organisms visible only through microscopes, yet they weaken the plant and lower the quality of its flower.
The best-known viruses affecting orchids are the Cymbidium mosaic virus and the Odontoglossum ringspot virus. According to various research papers, Cymbidium infects 56 orchid species, while Odontoglossum is a disease that affects 20 species.
You might hear from various growers that mixed infections are pretty standard when it comes to these two viruses. The reason is that none of them needs a vector.
Both Cymbidium and Odontoglossum infect the roots, leaves, flowers, and bulbs. Once the orchid catches one of these viruses, you will not be able to cure it. However, they are pretty resistant and can persevere in the soil or on tools for extended periods.
Cymbidium will appear some six weeks after the infection in the form of small, elongated, light green, or even yellow areas. Within three or four months, brown marks may appear as well. Various orchid species may show different symptoms.
Table of Cymbidium And Odontoglossum Symptoms For Different Orchid Species
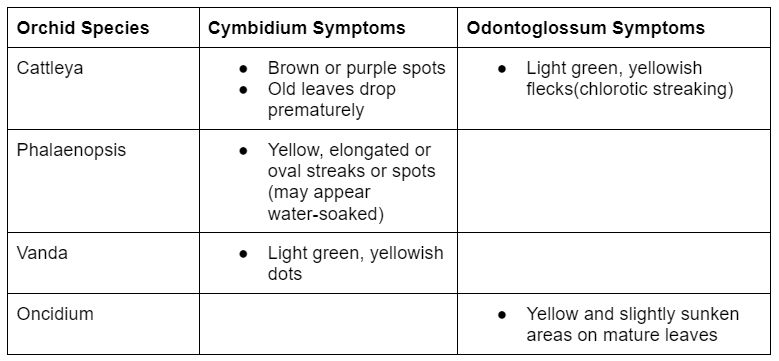
These symptoms will vary depending on the plant environment, cultivation, and virus species. Some of the plants will not show signs, yet you may notice a lack of vitality. If you suspect your plant is hosting a virus, the only way to know is through laboratory testing.
One of the standard tests is the Enzyme-linked immunosorbent assay (ELISA), which identifies the virus by using a specific antiserum. Aside from that, laboratories will apply methods that include hybridization, biological assays, and transmission electron microscopy.
How To Prevent Orcid Virus Infections?
To eliminate the possibility of your orchid getting infected with a virus, make sure the area where you grow orchids is clean.
Sterilize all of the tools after dividing plants or cutting flowers. You can use 10% bleach or trisodium phosphate to stop the virus from spreading.
Please, do not use the old pots and trays unless necessary. If you have to use them, wash them and sanitize thoroughly before that. You can also treat the containers with aerated steam.
When acquiring a new orchid, choose the plant free of viruses.
In most cases, seedings will have the infection rather than older plants. Ideally, you should be able to see negative laboratory test results before purchasing.
In case you are planning to keep the orchid in a greenhouse, protect it with mesh screening from insects, which can be virus carriers.
If you already have an infected plant, isolating and destroying it might be the best solution.
Yellowing Caused By Aging
Yellowing leaves on your orchid can also be a part of a natural aging process. Though they have a long life expectancy, orchids are still plants like any others.
That means it is not unusual to find some older, usually bottom, leaves yellowing. In that case, you should avoid cutting them because they will fall off after a while.
It is something that happens both to monopodial and sympodial orchids. Losing leaves every couple of years is typical for these plants.
Frequently Asked Questions
Should I Stop Using Fertilizer Completely On My Yellowing Orchid?
Some growers argue that the less is better. Even though a fertilizer drop can damage the plant, stopping using it altogether might not be a good idea.
Rather than that, the advice is to identify the right amount and apply it at the right time. After watering, you can follow the rule of thumb and apply fertilizer weakly. The majority of expert growers agree on using ones with a 20-20-20 ratio.
Should I Cut Off Yellow Orchid Leaves?
While lief removal is recommended in cases of fungal infections, you shouldn’t cut it off in any other case. That is because yellowing can be a part of an aging process for a large portion of orchid species.
It is not uncommon for older plants to have bottom foliage turn yellow, then brown, and after a while, fall off. If you try to pull it or cut it off before its time, you could damage the plants and create open wounds. That can further cause fungal infections, which are difficult to fight off and eradicate.
What Is The Best Tool For Removal Of Infected Orchid Leaves?
You can use either a razor or specialized orchid pruner. Whichever you decide to use, make sure you know how to handle it, and never forget to disinfect it properly.
Is It Better To Grow Orchid Under Lights?
Experienced growers say that it can be if you create the right conditions. That means the temperature and humidity of a growing area should be similar to the plant’s natural habitat — the forest. In addition, orchids should have as much light as they would receive in shadowy regions where they usually grow. You can always supplement them with natural sunlight if your bulb is not providing enough light.
You will know that by looking at the leaves. A healthy plant will have strong foliage in a light shade of green. However, they will darken due to a light deficiency, while a high exposure will turn them yellow.
What Is A Lifespan Of An Orchid?
Due to their sensitive nature, many think that orchids are short-lived. However, that is far from the truth. These plants don’t have a limited lifespan, and with proper care, they can live for decades.
After 15-20 years, orchids will produce fewer flowers and weaker ones. They will be more prone to infections, so you will need to repot them every couple of years to prevent that. As some growers say, they are practically immortal.
Orchid leaves turning yellow can be frustrating, but now you know how to fix it. Also, check out our other articles:
50 Types Of Orchid Flowers You Need To See (Including Pictures)


