Any good, healthy Peace Lily plant will eventually outgrow its pot, thus it’s crucial to sometimes transfer your plant into a bigger container. However, you shouldn’t just randomly tamper with its foundation. How do you know when to repot your Peace Lily?
In this article, we’ll list the warning signs that your plant requires extra space to flourish. Keep reading for 6 signs it’s time to repot your peace lily plus instructions for transplanting.
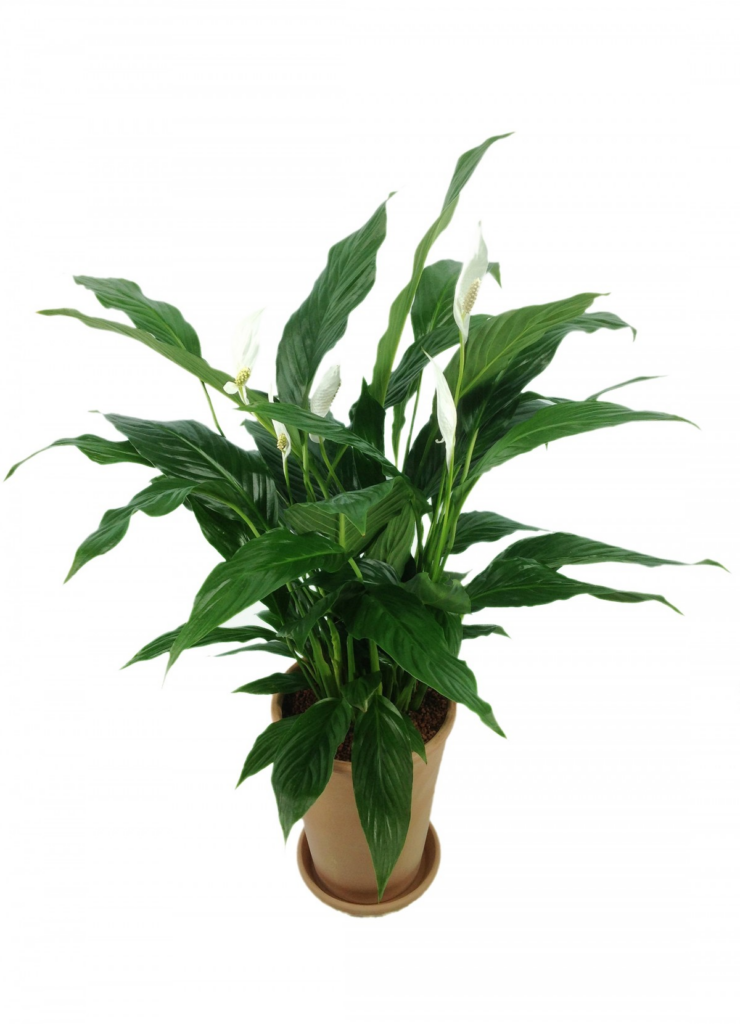
Every two to three years, it’s recommended to transfer your Peace Lily to a larger pot. If the plant receives a lot of light, you might need to repot it more frequently.
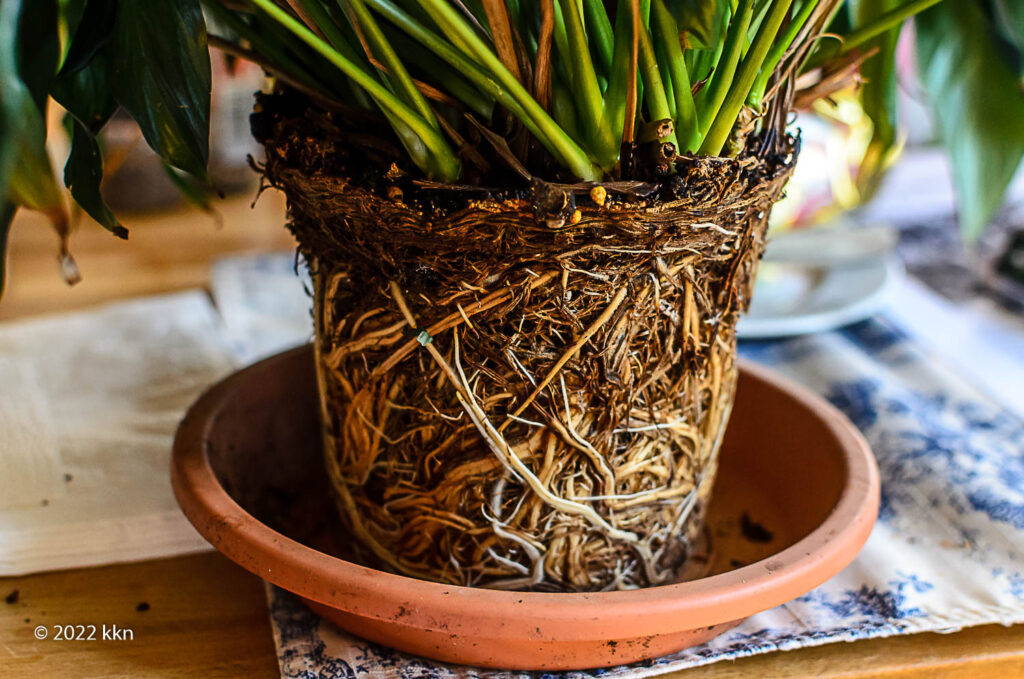
When the roots don’t have enough room, they may begin to stick out of the container and the soil may stop holding water. A Peace Lily that is severely root-bound will become stunted and wilt.
Keep on reading to find a detailed explanation of how to repot your Peace Lily in this article.
Signs That Your Peace Lily Needs Repotting
1. Stunted or Lack of Growth
A Peace Lily that is too big for its container may not be growing any bigger. Root development affects foliage growth. A Peace Lily’s growth above the soil will be constrained if it is unable to expand in its container.
In ideal circumstances, a Spathiphyllum grows a few inches and produces a few healthy new leaves each year. In contrast, a plant that is constrained by its roots may appear dormant. Or, if new leaves do emerge, they can be smaller than usual.
Keep in mind that insufficient amounts of sunshine, water, or nutrients might also result in poor growth. It’s likely that your Peace Lily is root bound if you’re certain that it has the capacity to expand but isn’t.
2. Insufficient Leaf Hydration
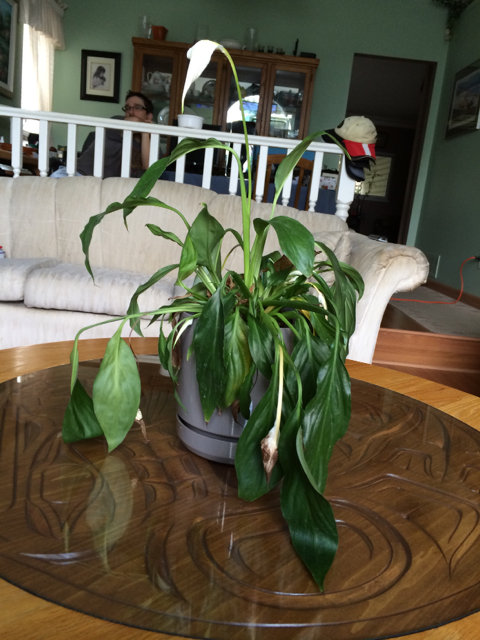
The outcomes are obvious when your Peace Lily’s pot is overrun with roots and cannot contain water. When the vegetation is dry, it has a tendency to collapse considerably. The majority of the leaves will likely start to turn brown and crispy around the tips and edges. Due to nutritional shortage, some of them may also become distorted and ragged.
Even if you water your lawn every day, you’ll probably still see some damage. Simply said, there are too many roots. To maintain the health of all the leaves, they cannot absorb enough nutrients and water.
You should constantly take other options into account. Very identical symptoms can be brought on by inadequate watering, sunburn, and fertilizer burn. Before you repot Peace Lilies, make sure none of these problems are present.
Keep on reading about Peace Lily watering.
3. Soggy Potting Soil
Although a Spathiphyllum like its roots to be somewhat damp, it won’t thrive in soil that is very wet. If the potting mix is still moist more than 4 or 5 days after watering, your plant is in jeopardy. The roots can’t take up oxygen because of the abundant water. And unhealthy bacteria and fungus thrive in mucky soil. As a result, your Peace Lily may get root rot, which is devastating.
By just watering until the top inch or two of soil is dry, you can lower this danger. But avoiding suffocating your Peace Lily’s roots is much more difficult with a dense enough potting mix.
Repotting your plant on a rough, soilless growth medium is something we’d suggest, as explained below. And you should absolutely replace the container with one that does if it lacks drainage holes.
Read more about best soil mixes for peace lilies.
4. Pot Is Not Holding Water
The dirt becomes crowded out as the roots of your Peace Lily fill the pot. Spongy organic materials are pushed out of the way or absorbed, whereas rocky or woody fragments might stay trapped between the roots. Eventually, hardly nothing in the pot is left that can absorb water.
One of the most obvious symptoms of a severely root-bound Peace Lily follows from this. As soon as you add water to the pot, it will begin to slowly drip out of the bottom. There isn’t a break when the earth gradually becomes wet since there isn’t much soil remaining.
When your plant reaches this stage, root entanglement-related health issues won’t be far behind.
Read more about best planters for peace lilies.
5. Overgrown Root Growth
A Peace Lily’s roots may attempt a jailbreak if they have nowhere else to go. You could notice roots looping out through the drainage holes or sprouting up through the soil’s surface.
Remember that the second symptom can also result from watering your Spathiphyllum from the bottom or from leaving the pot on a moist saucer. Roots naturally move closer to water sources. Your plant can try to get any nearby moisture through the drainage holes if there is any.
6. You Have Not Repotted Your Plant For A Long Time
Your Peace Lily will get root-bound if you keep it in the same pot for too long. That indicates that the roots closely encircle one another and cram in close together like sardines in a can.
Every two or three years, you should give your Peace Lily extra space to accommodate its demands. Of course, how much sunlight a Spathiphyllum receives affects its pace of development. If your plant is in a highly bright position, you might need to repot it as frequently as once every year.
Peace Lilies are said to “enjoy to be root bound.” Some articles even advise against moving your plant until it begins to exhibit symptoms of discomfort. But this is detrimental to the long-term health of your Peace Lily. Stressing your plant out repeatedly can weaken it, reduce its capacity for development, and make it more susceptible to disease and pests.
To be clear, no plant appreciates being confined by its roots. This misperception is the result of two general observations regarding indoor plants. First off, a plant that is somewhat larger than its pot has a lower risk of developing root rot. This is due to the limited space for the moist soil that serves as a haven for dangerous bacteria. Second, plants that are under stress from confined roots may start to bloom.
However, there are more effective ways to obtain these two advantages. With appropriate watering and a quality fresh potting mix, root rot may be avoided. And by giving a healthy Spathiphyllum a lot of indirect light, you can typically get it to blossom magnificently. There’s no need to deny its roots any room.
RELATED: Peace Lilies: Top Reasons Why Their Leaves Turn Brown and How To Fix Them
Things To Prepare For Peace Lily Repotting
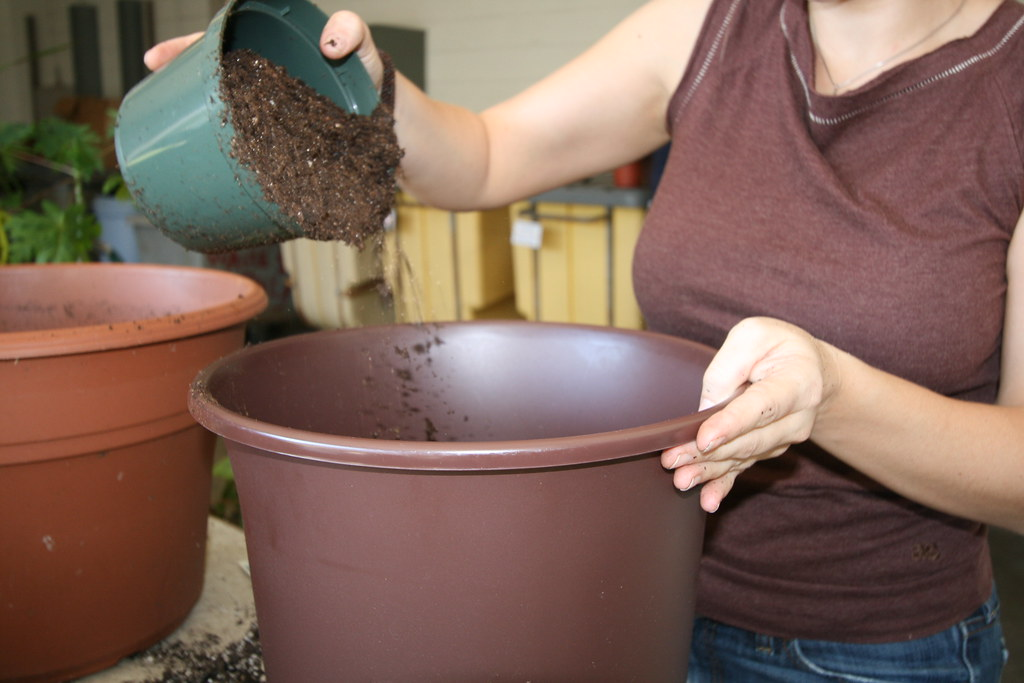
Successful repotting of your Peace Lily is primarily dependent on making the appropriate supplies. Here are all the things you need to prepare:
- Soil
The most crucial component to get right when repotting your Peace Lily is the soil. It serves as both the actual and symbolic cornerstone of your plant’s development.
Large-grained, slowly decomposing components should make up the majority of the soil for Peace Lily plants. These coarse components divide up the mixture to aid in aeration and drainage. There should be a lesser but still considerable portion of soft organic stuff. To prevent your Peace Lily’s roots from drying out, it holds onto a small amount of water.
If you’re making your own soil mix, try to mix 3 parts each of #3 perlite, chunks of orchid bark,and coconut coir, and 1 part of worm castings.
Furthermore, we advise using a soil mix made for aroids, the plant family that includes Spathiphyllum. You may also try combining equal parts of succulent soil and African violet mix.
- Plant Pots
If you’re potting up, pick a pot with a diameter that is about 2 inches larger than the previous one. You may just use a plastic nursery pot. Don’t enlarge it any farther than that. It’s much simpler to overwater a Peace Lily when you place it in a much bigger pot. It dries out more slowly because to the extra dirt in the container.
You will need a pot for every clone you intend to break off from your Peace Lily if you decide to divide it. Their sizes will vary depending on how big the young plants are. By keeping an eye out for the various foliage clusters inside your Peace Lily, you may make future plans.
The plant will be divided at the “crowns,” or intersections, between these clusters. Choose the crowns you wish to break off in advance, then purchase pots that will suit them.
Make certain that the bases of all your containers have drainage holes. Although the type of container doesn’t matter as much, terra cotta pots dry up more quickly. The porous clay allows moisture in the soil to evaporate through the container’s walls.
- Garden Materials and Tools
You’ll also require the following items when repotting a Peace Lily:
- Shears. In case you need to split or cut the roots, keep them on hand.
- Garden blade. You might wish to cut off a portion of the root ball if your Peace Lily is excessively crowded.
- Disinfectant. Every time you cut a plant, you should first sterilize your knife. Good alternatives include rubbing alcohol, hydrogen peroxide, and bleach in a 10% solution.
- Gloves. Although they might not be technically required, you’ll probably like having them.
- Old newspapers, towels, etc. You will be transferring a lot of dirt. Lay down something to reduce the mess if you’re doing that indoors!
How To Repot A Peace Lily
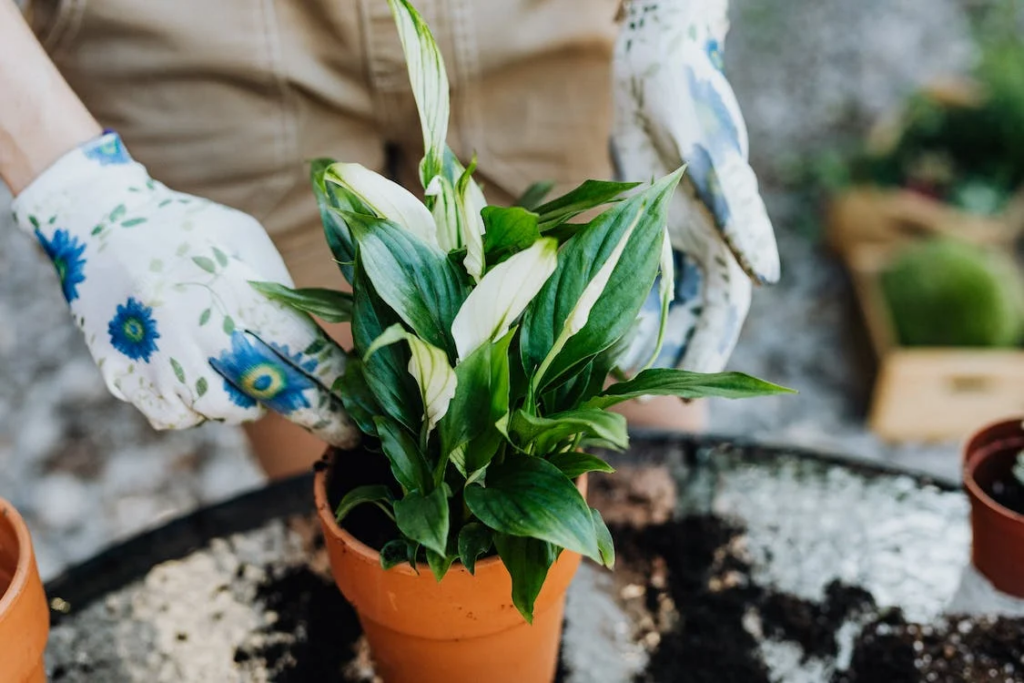
- The day before you transfer your plant, water it. Since its roots won’t be functioning at their best for a time, you should make sure it has a full tank of hydration.
- Cut off any leaves or blossoms that have already started to turn brown, yellow, or shriveled due to aging. They won’t last long anyhow. By removing them, your plant may focus its efforts on healing from the transplant.
- Tip your Peace Lily out of the pot while holding it at the base. You can occasionally aid to free up the roots by rubbing your knife along the inside rim. It also works if you tap the bottom of the pot.
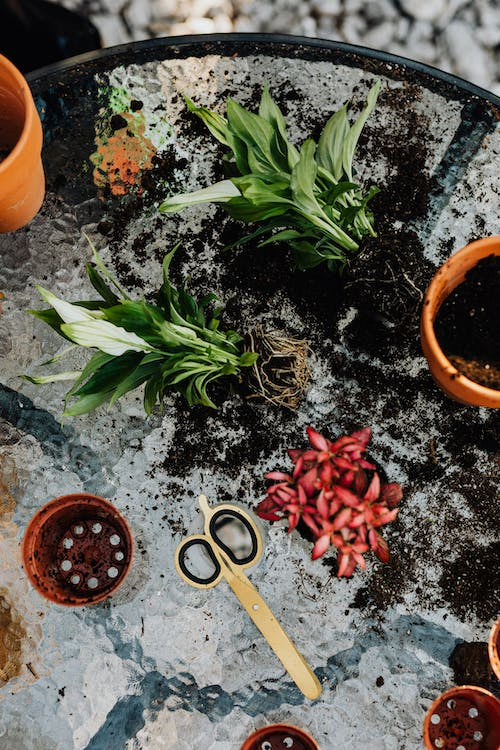
- Remove the majority of the dirt on your plant. You can wash the plant if required. Look for any roots that are sticky, spongy, black, or brown. If you notice any, chop them off because they are decaying. In between cuts, clean your clippers.
- Locate the point where the roots of two crowns diverge, and grasp the stems on either side. Till they separate, slowly pull the two parts apart. Repeat this process until you have created all the clones you desire.
- Using both gentle and forceful pressure, spread the root mass a little with your fingertips. As a result, the roots spread outward rather than becoming closer together.
- You should undertake a little trimming if your Peace Lily is completely encircled by lengthy roots and is severely pot-bound. Clean your scissors or knife beforehand. Then, you may either cut off the bottom 1/4 of the root ball, the sides, or both. It usually seems strange, but as long as you leave at least 2/3 of the Peace Lily’s root mass, everything will be well.
- Lightly watered dirt should occupy the bottom third of each container. Put each Peace Lily in its new container. The, spread the potting mix over the roots. Don’t pack the soil too tightly; you can shake or tap the container to let the dirt settle.
RELATED: How To Save An Overwatered Peace Lily From Dying? A Comprehensive Guide
How To Reduce The Risk of Transplant Shock
Improper watering after transplanting is one of the most frequent causes of transplant shock. When soil becomes wet from excessive irrigation, the roots may rot. The plant may wilt and lose leaves if it is under-watered.
Before watering, it’s crucial to inspect the soil to prevent over- or under-watering. To achieve this, insert your finger into the ground up to your first knuckle. It’s time to water if the soil is dry. Wait a few days before checking again whether the soil is damp.
Additionally, it’s crucial to check that your plant has adequate drainage. Without drainage holes, water will collect at the bottom of the pot and destroy the roots. Simply drill or carefully cut numerous holes in the bottom of the pot to provide drainage holes. It’s best to do this before adding your plant to prevent seriously harming the roots.
Finally, make sure the pot you select is only marginally bigger than the one you now have. A pot that is too big will retain too much water, which may cause root rot. If the container is too tiny, the plant won’t have enough area to expand and its development may be stunted.
FAQs
How should a peace lily with root rot be replanted?
Remove your peace lily from its present pot if you suspect it has root rot. After removing any mushy or dark roots, thoroughly rinse the remaining roots in clean water. The next step is to select a new pot that is just a little bit bigger than the previous one and to fill it with brand-new potting soil.
Transfer your peace lily gently to the new container and give it plenty of water. After that, your plant will start to heal if you follow the care instructions listed above.
Do I need to repot a small peace lily?
It’s usually time to repot a little peace lily if the roots are entangled. Repotting will offer the plant more area to expand and enable the roots to receive the necessary amounts of oxygen. When the plant is actively developing, in the spring or early summer, is the optimal time to repot.
Repotting a little peace lily is quite OK; just be careful not to put it in a container that is too big for it. Every time you repot your peace lily, only increase the diameter by 1-2″ to make sure it can adjust and to avoid future watering issues.
Final Thoughts
Your plant probably needs extra room if it is stunted, withering, and unable to retain water. However, if you keep repotting your Peace Lily every few years, you might never notice those warning indications!
We hope this article has given you the assurance you need to relocate your Spathiphyllum to a roomy new location.
Now you know how to repot a peace lily. Check out more of our articles:
How to Care for Monstera Plants? All the Answers and More!
Bothers, Be Gone: 16 Different Types Of Begonias
Variegated String Of Pearls 101 | How To Grow & Care For This Dazzling Succulent!


